


Is your Indian passport nearing its expiry date? Living in the USA means navigating a specific process to get it renewed. Don’t worry, you’re not alone. Thousands of Indian citizens in the US go through this every year. It can seem a bit daunting with all the forms and requirements, but with the right guidance, it’s smoother than you think. This comprehensive 2025 guide will walk you through every single step, from understanding your options to finally holding your new passport.
Let’s get your Indian passport renewal sorted, so you can focus on what matters – whether it’s your studies, work, or family here in the States.
Introduction
Renewing your Indian passport in the USA isn’t just about filling out a form. It’s a structured process managed primarily by VFS Global, acting on behalf of the Indian Consulates and the Embassy in the United States. Think of VFS Global as the bridge between you and the Indian government for passport services. They streamline the application, document collection, and submission process.
This guide is designed to cut through the confusion. We’ll break down the requirements, explain the differences between normal and Tatkal services, detail the documents you’ll need, and show you exactly how to track your application. Our goal is to make this process as clear and stress-free as possible.
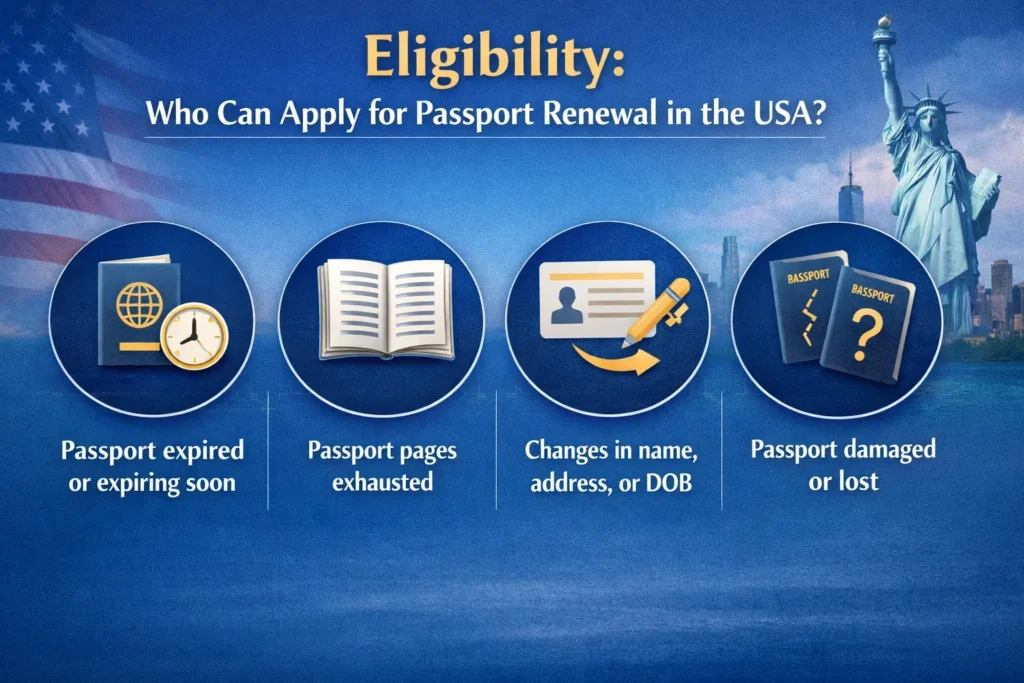
Eligibility: Who Can Apply for Passport Renewal in the USA?
Before you dive into the application, let’s quickly confirm if you’re eligible to renew your Indian passport in the USA.
You can apply for a passport renewal if:
- Your current Indian passport has expired or is due to expire soon (typically within one year).
- Your passport pages are exhausted, and you need a new booklet.
- Your personal particulars (like name, address, or date of birth) have changed, and you need a re-issuance to reflect these changes.
- Your passport is damaged or lost, requiring a re-issuance.
Generally, if you are an Indian citizen residing in the USA with a valid US visa or status (e.g., H1B, F1, L1, Green Card), you can apply for renewal through VFS Global. Even if your US visa has expired but you have a pending extension or change of status, you might still be able to apply – we’ll cover this in the FAQs.
The key is that you must be an Indian citizen. If you’ve renounced your Indian citizenship and acquired US citizenship, then you’d be looking into an OCI card, not a passport renewal. (For details on that, check out our “How to Apply for OCI Card in the USA” article).
Choosing Between Normal and Tatkal Services
When it comes to renewing your Indian passport, you have two primary options: Normal (Standard) service and Tatkal (Emergency) service. The choice largely depends on how quickly you need your new passport.
Normal Service: This is the standard procedure. It’s the most common and cost-effective option. If you have no immediate travel plans and can wait for the usual processing times, Normal service is for you. Most people opt for this to save on additional fees. The processing time is longer, but it’s predictable.
Tatkal Service: This option is for urgent situations. Maybe you have an emergency trip back to India, or your visa stamping requires a passport with more validity, and you’re running out of time. Tatkal service significantly speeds up the processing. However, it comes with a higher fee and stricter documentation requirements. Not all situations qualify for Tatkal, and the decision rests with the Consulate. For instance, you might need a flight ticket confirming immediate travel.
My personal experience with Tatkal was during an unexpected family emergency. The added cost was worth the peace of mind, knowing the passport would arrive much faster.
Consider your deadlines carefully. While Tatkal is faster, it’s not instantaneous. There’s still a processing period, albeit a compressed one. If you have the luxury of time, Normal service is always recommended.
Step-by-Step Process to Renew Indian Passport In USA
This is where the rubber meets the road. Follow these steps meticulously to ensure a smooth application process.
1. Complete the Passport Seva Online Form (PSK Form I)
This is your starting point, regardless of whether you choose Normal or Tatkal.
- Visit the Official Passport Seva Website: Go to Passport Seva. This is the government’s official portal.
- Register and Log In: If you don’t have an account, register as a new user. If you already have one, simply log in.
- Select “Apply for Fresh Passport/Re-issue of Passport”: Choose the appropriate option. For renewal, you’ll select “Re-issue of Passport.”
- Fill the Application Form: This is a detailed form. Take your time.
- Passport Type: Select “Re-issue.”
- Reason for Re-issue: Choose the relevant option (e.g., “Validity Expired/Expiring,” “Exhaustion of Pages,” “Change in Existing Personal Particulars,” “Damaged Passport,” “Lost Passport”).
- Application Type: Select “Normal” or “Tatkal” based on your earlier decision.
- Booklet Type: Choose between 36 pages or 60 pages. A 60-page booklet is useful if you travel frequently and need more visa pages.
- Personal Details: Fill in your name, date of birth, place of birth, and other personal information exactly as it appears in your current passport. Any discrepancies can cause delays.
- Address Details: Provide your current Indian address and your US address.
- Emergency Contact: Provide details of a contact person in India.
- Family Details: Fill in your parents’ and spouse’s names.
- Review and Save: Double-check every single field for accuracy. Typos can be a nightmare. Once satisfied, save and print the application form. You’ll get an ARN (Application Reference Number). Keep this number safe! It’s your unique identifier.
Pro Tip: I always recommend having your current passport and any supporting documents open while filling this form. It helps avoid errors and makes the process quicker.
2. Book Appointment with VFS Global
Once you have your completed PSK form and ARN, your next step is with VFS Global. VFS Global manages all Indian passport applications in the USA.
- Visit the VFS Global India | USA Website: This is crucial. Make sure you are on the correct VFS Global website for Indian passport services in the USA.
- Register on VFS Global: Create an account if you haven’t already.
- Start a New Application: Follow the prompts to start a new passport application. You’ll need to link your PSK form by entering your ARN.
- Select Your Jurisdiction: This is important! VFS Global operates through different processing centers linked to specific Indian Consulates (New York, San Francisco, Houston, Chicago, Atlanta, Washington DC). Your jurisdiction is determined by your current US residential address. For example, if you live in California, your jurisdiction is the Consulate General of India, San Francisco.
- Fill Out VFS-Specific Forms: VFS Global will have some additional forms or declarations for you to complete online. These usually include a “Document Checklist” and an “Annexure E” (for self-declaration).
- Pay the Fees: You’ll pay the passport fees and VFS service charges online through the VFS portal. We’ll delve into fees in a later section.
- Book an Appointment (If Required): Most Indian passport applications through VFS Global are submitted by mail. However, in some exceptional cases or for certain services (like Tatkal, or if you reside very close to a VFS center and an appointment option is available), you might be able to book an in-person appointment. Always check the latest VFS Global guidelines for your jurisdiction.
- Print all VFS Forms: Print the completed VFS forms, including the checklist, declaration forms, and the shipping labels (if applicable).
3. Prepare Documents & Self-Attest
This is arguably the most critical part. Your application lives or dies by your documentation. A missing document or an un-attested copy can lead to rejection and significant delays.
General Rule: Always send originals AND self-attested photocopies of all required documents.
Self-Attestation: This means you sign a photocopy of the document yourself, writing “Self-Attested” on it. Do not send original documents unless specifically asked, especially your US Green Card or EAD. Only send your original passport.
Here’s a breakdown of what you’ll generally need:
- Printed PSK Form: The one you completed on the Passport Seva website, signed and dated.
- Printed VFS Global Forms: Including the Document Checklist, Annexure E, and any other declarations generated by VFS.
- Current Original Indian Passport: This is essential. It will be cancelled upon issuance of your new passport.
- Photocopy of your current Indian Passport: Front and back pages, and any pages with visas or observations.
- Proof of Indian Citizenship: (Covered in detail below)
- Valid US Visa / I-94: (Covered in detail below)
- Address Proof & Photos: (Covered in detail below)
- Other Supporting Documents: (Covered in detail below, specific to your situation)
- Payment Confirmation: Proof of payment of fees (usually automatically generated by VFS).
- Shipping Labels: Prepaid return shipping label (if you chose postal submission) and the inbound shipping label (if required by VFS). VFS Global typically uses FedEx or UPS. You’ll usually purchase these directly through the VFS portal or generate them on the courier company’s website.
Organize everything neatly. Use clips, not staples, to group related documents. Arrange them in the order specified in the VFS checklist.
4. Submit at VFS – What Happens at the Consulate?
Most applications are submitted by mail. After you’ve prepared your documents, carefully package them.
- Mail Your Application: Use the courier service you selected (usually FedEx or UPS) and the labels generated through VFS Global. Ensure you use a trackable service. This package will go to the VFS Global processing center for your jurisdiction.
- VFS Global Processing: Once VFS Global receives your application, they will conduct an initial review. They check if all documents are present and correctly filled out. If anything is missing or incorrect, they will notify you (usually by email) and might ask for additional documents or corrections. This is where most delays happen if documents are not perfectly in order.
- Forwarding to the Consulate: If VFS Global finds your application complete, they will forward it to the respective Indian Consulate/Embassy in the USA.
- Consulate Processing: The Consulate then reviews the application. This is where the actual passport renewal decision is made. They verify your identity, citizenship, and other details. They might conduct background checks.
- Passport Printing: If approved, your new passport is printed.
- Dispatch from Consulate to VFS: The new passport is sent back to VFS Global.
- Dispatch from VFS to You: VFS Global will then mail the new passport (and your old, cancelled passport) back to your provided address using the prepaid return label.
What happens at the Consulate is largely behind the scenes. Your primary interaction will be with VFS Global.
Documents Required (Checklist)
Let’s break down the essential documents you’ll need. Gather these carefully!
Proof of Indian Citizenship
This is straightforward:
- Original Indian Passport: Your current passport is your primary proof.
- Photocopy of your Indian Passport: Make photocopies of the first two pages, the last two pages, and any pages showing endorsements, observations, or valid visas (if any).
Valid US Visa / I-94
This proves your legal status in the USA.
- Copy of your Valid US Visa: A copy of your most recent valid US visa stamp in your passport.
- Copy of your I-94: This is your Arrival/Departure Record. You can download the most recent I-94 from the CBP website.
- Proof of Current US Status (if applicable):
- H1B/L1: Copy of your latest I-797 approval notice.
- F1 (Student): Copy of your I-20 form.
- J1 (Exchange Visitor): Copy of your DS-2019 form.
- Green Card Holder: Copy of your Green Card (both sides).
- EAD (Employment Authorization Document): Copy of your EAD card (both sides) along with your I-797 (if applicable, for I-485 pending).
- Asylum Seekers/Refugees: Appropriate documentation from USCIS.
Self-attest all copies of these documents.
Address Proof & Photos
Crucial for identifying you and where to send your passport.
- US Address Proof: You need at least two documents proving your current US address. Acceptable documents include:
- US Driver’s License or State ID
- Utility Bills (electricity, gas, water, landline phone bill – mobile phone bills are usually not accepted)
- Lease Agreement (signed by both parties)
- Bank Statement (recent, showing your address)
- Mortgage Deed
- Indian Address Proof: A document proving your address in India. This could be:
- Aadhaar Card
- Indian Driver’s License
- Utility Bill (electricity, water, landline phone bill)
- Bank Passbook (first page with address)
- Voter ID Card
- Passport Photos: Two recent (within the last 6 months), identical, color photographs.
- Size: 2×2 inches (51×51 mm).
- Background: Plain white or off-white background.
- Face: Full face, front view, open eyes, natural expression.
- No Shadows: Ensure no shadows on your face or the background.
- Head Covering: If worn for religious reasons, must not obscure facial features.
- Glasses: Generally, no glasses. If medically necessary, a doctor’s note might be required, and ensure no glare.
- No Hair Covering Ears: Unless for religious reasons, ears should be visible.
My advice: Get professional passport photos taken. CVS, Walgreens, or a dedicated passport photo studio are good options. Don’t try to take them yourself unless you are absolutely sure they meet the strict requirements.
Other Supporting Docs (name change, minors, etc.)
Depending on your specific situation, you might need additional documents:
- Name Change:
- Marriage: Marriage certificate (Indian or US) for spouse’s name change.
- Other Name Change: Original newspaper advertisements (one in an Indian newspaper, one in a US newspaper) and a deed poll/sworn affidavit.
- Divorce: Divorce decree.
- Minor Applicants (under 18):
- Original Passport of Minor.
- Copies of Parent’s Passports: Both parents must submit self-attested copies of their Indian passports.
- Marriage Certificate of Parents: If applicable.
- Birth Certificate of Minor: Original and copy.
- Annexure D: Signed by both parents.
- Annexure C (if one parent is not present): Signed by the single parent.
- Parental Consent: If one parent is not in the USA, an affidavit from that parent consenting to the minor’s passport application, attested by an Indian mission abroad.
- Address Proof: One of the parents’ address proof in the USA.
- Minor’s Photo: Two passport-sized photos.
- Lost/Damaged Passport:
- Police Report (FIR): For lost passports, a police report from the US police department where it was lost.
- Annexure F: For lost/damaged passports.
- Original Passport Copy: If available.
- Proof of Identity: Other valid IDs.
- Change in Date of Birth/Place of Birth:
- Birth Certificate or school leaving certificate showing correct details.
- Affidavit.
- Resumption of Indian Citizenship: If you had renounced Indian citizenship previously and are now resuming it, you’ll need specific documentation related to the renunciation and resumption process. This is a complex scenario and requires careful attention to detail.
Always check the VFS Global website for the most current and specific document checklists for your application type and jurisdiction. They update these frequently!
Fees & Payment Options (Including Tatkal)
Understanding the fees is essential to avoid surprises. The fees comprise the government passport fee and VFS Global service charges.
Normal Service Fees:
- Passport Fee: This is the standard fee for a 36-page or 60-page booklet. The exact amount can vary slightly but is usually around $75-$80 for a 10-year validity passport. For minors, it’s typically lower and valid for 5 years or until they turn 18, whichever is earlier.
- VFS Global Service Charge: This is a fixed fee charged by VFS Global for their services (processing, handling, etc.). It’s usually around $15.90.
- Consular Surcharge: A small additional charge, usually a few dollars.
- Courier Fees: These are separate and depend on the shipping provider (FedEx/UPS). You will pay for both inbound (to VFS) and outbound (from VFS to you) shipping. This can be around $30-$50 depending on the service you choose.
Tatkal Service Fees:
- Tatkal Fee: This is an additional emergency processing fee on top of the normal passport fee. It can be significant, often doubling the government passport fee. Expect to pay an extra $150-$200 for Tatkal service.
- VFS Global Service Charge: The same as for normal service.
- Consular Surcharge: The same as for normal service.
- Courier Fees: Same as for normal service.
Payment Options:
- Online Payment through VFS Global Portal: This is the most common and preferred method. VFS Global will guide you through the payment gateway. You can typically use credit/debit cards.
- Money Order/Cashier’s Check: In some cases, VFS Global might allow payment via money order or cashier’s check, payable to “VFS Services USA Inc.” Always check their website for the most up-to-date payment methods for your specific service and jurisdiction. Never send cash by mail.
Important Note on Fees: All fees are subject to change by the Government of India or VFS Global. Always refer to the VFS Global website for the latest fee structure before making any payments. Fees are generally non-refundable, even if your application is rejected due to incomplete documentation.
Processing Time & How to Track Your Application
The waiting game begins! Understanding processing times and how to track your application can ease some of the anxiety.
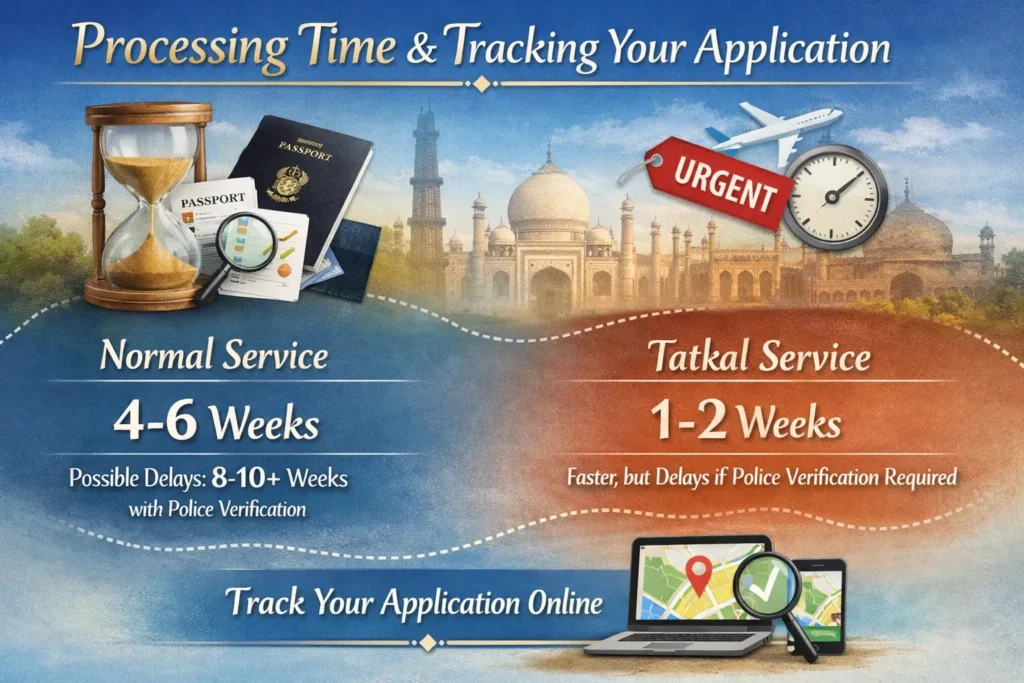
Processing Time:
- Normal Service:
- Typically takes 4-6 weeks from the date VFS Global receives your complete application.
- This can extend to 8-10 weeks or even longer if there are discrepancies, missing documents, or if your application requires police verification in India (which happens in certain cases, e.g., first-time passport, major data change, or if your previous passport was issued from India a long time ago).
- Tatkal Service:
- Generally takes 1-2 weeks from the date VFS Global receives your complete application.
- Again, this can be longer if police verification is needed, though Tatkal is designed to minimize such delays.
My neighbor once had his Normal application take nearly 3 months because of a minor address discrepancy that triggered a police verification back in India. It’s a reminder that patience is key, and getting documents right the first time helps avoid these extended waits.
Factors that can affect processing time:
- Completeness of Application: The biggest factor. Incomplete applications lead to delays.
- Jurisdiction: Some Consulates might process applications slightly faster or slower than others, depending on their workload.
- Police Verification: If required, this can add significant time.
- Peak Season: Holiday seasons or times with high application volumes can lead to longer waits.
How to Track Your Application:
You have two main ways to track your Indian passport renewal application:
- VFS Global Tracking:
- This is your primary tracking portal.
- Go to the VFS Global India | USA website.
- There will be a “Track Your Application” section.
- Enter your Reference Number (provided by VFS Global when you complete their online application) and your Date of Birth.
- The VFS tracker will show you the status of your application within their system (e.g., “Application Received by VFS,” “Under Process at VFS,” “Forwarded to Consulate,” “Processed at Consulate,” “Dispatched from Consulate,” “Received by VFS,” “Dispatched to Applicant”).
- Passport Seva Tracking:
- Once your application is forwarded to the Consulate, you can also track it on the Passport Seva website (Passport Seva).
- Under “Application Status,” click on “Track Application Status.”
- Enter your ARN (Application Reference Number from the PSK form) and your Date of Birth.
- This tracker will show you the status from the Indian government’s side (e.g., “Application submitted and is under review,” “Passport printing initiated,” “Passport dispatched”).
Pro Tip: Track regularly, but don’t obsess over it daily. The statuses don’t update in real-time, and sometimes there can be a lag. You’ll typically receive email updates from VFS Global when there’s a significant change in status. Also, keep your courier tracking number handy for the return shipment from VFS Global.
Passport Pick-Up or Home Delivery – What to Expect
Once your passport is renewed, you’ll be eager to get your hands on it.
- Home Delivery (Most Common): For most applicants, your new passport, along with your old, cancelled passport, will be delivered to the address you provided in your application via the prepaid return courier label you included. VFS Global will send you a notification (usually by email) when your passport has been dispatched. You can then use the courier tracking number to monitor its journey.
- Pick-Up (Rare): In extremely rare cases, or if you applied in person at a VFS center that offers this service and you specifically opted for it, you might be able to pick up your passport. However, mail delivery is the standard. Always confirm the pick-up option with VFS Global if you intend to do so, as policies can change.
What to Expect upon Delivery:
- New Passport: Your shiny new Indian passport will be enclosed. Double-check all the details on it – your name, date of birth, place of birth, and validity period. Ensure there are no errors.
- Old Passport: Your old passport will also be returned. It will have a corner clipped or holes punched in it, indicating that it has been “Cancelled.” This is normal. It’s still returned to you for record-keeping and any old visas it may contain (though these visas may or may not still be valid for travel, depending on the issuing country’s rules).
If you find any errors in your new passport, contact VFS Global immediately. Do not attempt to travel with an incorrect passport.
FAQs
Let’s address some common questions that often arise during the passport renewal process.
Can I apply before expiry?
Yes, absolutely! In fact, it’s highly recommended. You can apply for a passport renewal up to one year before its expiry date. Applying in advance gives you ample time to navigate the process without stress or urgent travel plans being affected. It also guards against unforeseen delays. Don’t wait until the last minute!
What if my US visa is expired?
This is a common concern. If your US visa stamp in your passport has expired, but you have a valid I-797 (Notice of Action) or I-20 form indicating a pending extension of stay, change of status, or approved status, you can generally still apply for passport renewal. You must provide a copy of your current I-94 and the relevant USCIS approval/receipt notice (e.g., I-797 for H1B, I-20 for F1).
However, if your US status has genuinely expired and you have no pending application with USCIS, then your legal presence in the US might be an issue. In such cases, it’s best to consult with an immigration attorney or contact the Consulate directly for guidance.
How to renew Indian Passport for minors?
Renewing a passport for a minor (under 18) has a few extra steps:
- Parental Consent: Both parents must sign the application form (PSK Form) and Annexure D. If one parent is not available, Annexure C and potentially an attested affidavit from the absent parent are required.
- Parent Passports: Self-attested copies of both parents’ valid Indian passports are mandatory.
- Minor’s Birth Certificate: The original and a copy.
- Proof of Address: One parent’s US address proof.
- Photos: Two recent passport-sized photos of the minor.
The passport for a minor is generally issued with a validity of 5 years or until the minor turns 18, whichever is earlier.
How to do Lost Passport Renewal?
Losing your passport in a foreign country can be unsettling. The process for re-issuing a lost Indian passport is similar to renewal but requires additional documentation:
- Police Report (FIR): You must file a police report with the local US police department where your passport was lost or stolen. A copy of this report is mandatory.
- Annexure F: This is an affidavit for lost/damaged passports, which you’ll fill out and submit.
- Circumstantial Letter: A letter explaining the circumstances under which the passport was lost.
- Proof of Identity: Any other valid identification you have (e.g., US Driver’s License, copy of previous passport if available).
The processing time for a lost passport re-issuance can be longer due to additional verification checks.
Is the offline consulate option available?
Generally, no. For regular passport renewal and re-issuance services in the USA, all applications are processed through VFS Global. The Indian Consulates and the Embassy in the USA have outsourced this service to VFS Global to streamline the process. You cannot walk into a Consulate for a routine passport renewal application.
However, Consulates may handle specific emergency cases (e.g., urgent travel document in extreme situations) on a case-by-case basis, but this is not for routine renewals. Always check the specific Consulate’s website for any exceptional circumstances or limited direct services they might offer.
Tips Before You Apply
A little preparation goes a long way.
- Read the VFS Checklist Carefully: Seriously, read it multiple times. Each jurisdiction (New York, San Francisco, etc.) and application type might have slightly different requirements. Don’t assume.
- Gather Documents Early: Don’t wait until the last minute. Some documents might take time to procure (e.g., an updated bank statement, a new utility bill).
- Photocopy Everything: Before you send anything, make a complete set of photocopies of your entire application package for your own records. This includes the PSK form, VFS forms, all supporting documents, and even your shipping labels.
- Use a Trackable Courier Service: When mailing your application to VFS Global, always use a reliable service like FedEx or UPS that provides a tracking number.
- Double-Check Your Photos: Passport photo requirements are very strict. Any deviation can lead to rejection.
- Keep Your ARN & VFS Reference Number Safe: These are your keys to tracking your application.
- Don’t Laminate Documents: Never laminate your original passport or any other official documents.
- Be Patient: The process takes time. Avoid contacting VFS or the Consulate repeatedly if your application is within the stated processing times. Use the online tracking portals.
Final Overview & Next Steps
Renewing your Indian passport in the USA is a multi-step process, but it’s entirely manageable. By following this guide, understanding the requirements, and meticulously preparing your documents, you can ensure a smooth experience.
Here’s a quick recap of the essential steps:
- Complete the PSK Form online.
- Register and complete the application on the VFS Global website, select your jurisdiction, and pay fees.
- Prepare all required documents, ensuring they are self-attested and in the correct order.
- Mail your complete application package to VFS Global using a trackable courier service.
- Track your application online via VFS Global and Passport Seva websites.
- Receive your new passport by mail.
Ready to start your passport renewal journey?
Need Help? Contact Our Support Team
External Links for reference:
- Passport Seva – official application portal
- VFS Global India | USA – submission & tracking (Direct link to the relevant VFS Global USA page for Indian passport services)
- Consulate General of India – New York (Example – replace with specific consulate relevant to user’s location or list all of them if space permits)
- Consulate General of India – San Francisco
- Consulate General of India – Houston
- Consulate General of India – Chicago
- Consulate General of India – Atlanta
- Embassy of India – Washington DC
Also Read: How To Renew Indian Passport in UK
Also Read: How Much Gold Can I Carry From The USA To India?
Also Read: How To Renew Indian Passport in Italy
Also Read: How To Renew Indian Passport in France
Also Read: How To Renew Indian Passport in New Zealand

0 Comments